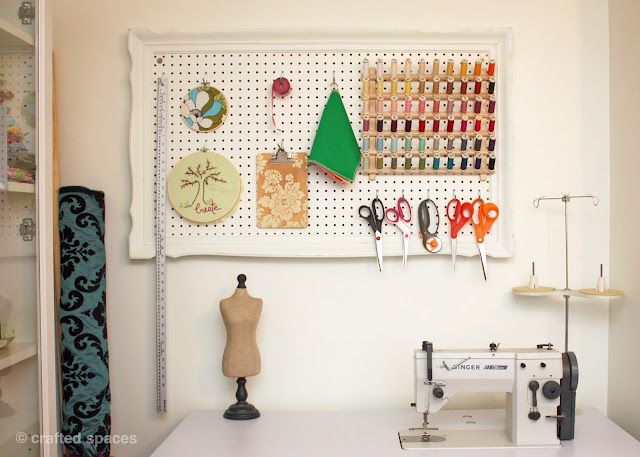
You can use a pegboard in any room in your home; however, I do not think that any craft or sewing space will be complete without one. A pegboard is a great way to organize tons of items and it can also add some interest to your wall.
In the process of giving my sewing and craft studios a makeover, I decided to make my own pegboard. I wanted something a little more ornate (yet functional) than many of the pegboards that I had come across. In other words, look pretty and do the job.
I decided to use one of the vintage frames from my stash and purchased a sheet of the pegboard at HomeDepot.
With the help of my husband Don, I cut the pegboard down to size. I was also lucky to get another piece just big enough to make a second (smaller) framed pegboard. The pegboard I purchased already had a white finish on one side, however I wanted to match the colour of the frame and pegboard. I painted over the pegboard using a small smooth roller. I could have used spray paint as an alternative.
The frame already had a gold metallic finish (from a previous project I had done with it) and I wanted to freshen things up a bit by adding a coat of soft cream paint. Plus, I did not want a gold coloured frame for my sewing studio. I painted the frame and lightly sanded between coats. I also lightly sanded some of the edges and upraised edges of the frame so you could see a little of the gold as highlights.
Don also helped me cut two pieces of 1" x 2" strappings, which was mounted to the wall at the wall studs.
Pegboard How-to:
- Cut the pegboard to the dimensions of the inside of your frame.
- Paint your frame and pegboard in your desired colour(s).
- Glue the pegboard into your frame using carpenters glue or an epoxy.
- Cut two strips of 1" x 2" wood to the same length of your frame's width or length. (This will become your strapping and it will also create some depth away from the wall for your pegboard to work properly.)
- Screw your strappings to the wall. (Consider using plastic anchors if mounting on drywall, otherwise find the wall stud and use a long screw.)
- Mount your pegboard onto the strapping using a screws and washers. (You are screwing into the pegboard, not the frame)
- You can paint the top of your screws and washers if desired.
If you will like to forgo on the frame, check out Martha Stewart for some tips on how to make and install a pegboard.
Here are some more great pegboard inspiration:
- DIY Wednesday: Pegboard Wall Unit - Design Sponge
- The Transformation Begins - Just a Girl
- Framed Peg Board & Spool Organization - Life Created
- How to: Make a Pegboard Wall Organizer - Apartment Therapy


Love the idea. Thanks for the step by step help.
ReplyDeleteI hope you have fun making one. Thanks for visiting and leaving a comment.
Delete